I have done chocolate baklava before, but I haven’t done my own chocolate spread either filo pastry.
Somehow I came to this video about the history of the most famous chocolate spread. And all started with Napoleon blocking Britain… and then lack of chocolate beans into Italy. To be honest, it was quite interesting all the details and the evolution to the product we have today. Funny enough, in Spain, we had a “local” version called nocilla. And it was amazing. I only found nutella in UK so I always though it was a local thing that chocolate spread. And I remember having nocilla in the fridge during summer time so it was hard and refreshing. And even used to try nocilla with cheese… dont know where that came from but it was an interesting taste of sweet and sour thing. Anyway, I have only bought nutella in the last years for baklava only as it was full of sugar (no much cocoa, hazelnut on it) and full of palm oil.
As well, I have always been keen to try to make filo pastry so I had this video in my to-cook list.
So combining both things, I spend the Saturday morning in my cooking challenge:
Chocolate Spread Ingredients:
- 400g hazelnuts (not roasted so with skin) = 2 cups
- 1 cup of powder sugar
- 1 cup of 100% cocoa powder
- pinch of salt
- 2 tsp of coconut oil
- 1 tsp vanilla paste (the real thing, no extract)
- 100g dark chocolate
- water
Chocolate Spread process:
- Pre-heat oven at 175C. In a baking try spread the hazelnuts. Put in the oven
- Remove after 15-20 minutes. Let to cool down a bit and remove skin. I used my hands rubbing the hazelnuts like washing my hands. I tried put some in kitchen towel but at the end I smashed them too much and I continue by hand.
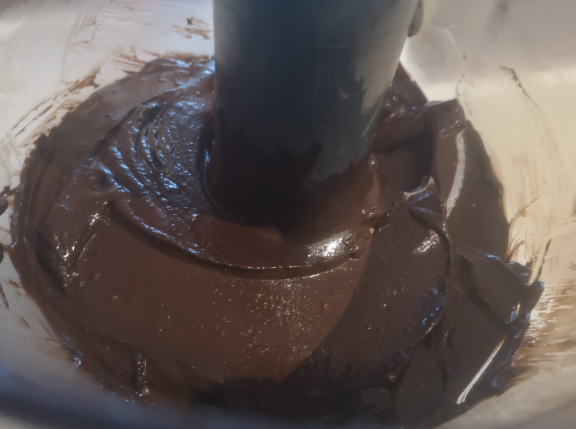
- Put all the hazelnut in the food processor. At medium/high speed for several minutes until you start seeing oil from the nuts and becomes more liquid than paste.
- Then add the sugar, cocoa, salt, coconut oil and vanilla. Keep blending until everything is combined.
- Then add the 100g dark chocolate melted by bain-marie
- I didnt get a think paste, it was a bit creamy. I was happy with the taste but I decided to add the water as the video mentioned…. I added a bit of water and not sure what I did but the liquid paste became solid… I got in panic mode….. but I continued adding bit a water and blending until finally got a cream again!! Likely I added a full cup of water…. I tasted it and it was very good. Very dark chocolaty with a kick of the hazelnut at the end. It didnt taste as sugary as nutella so it nice (but it can be an issue if you expect nutella taste). As well, as it has just a bit of coconut oil, it is not going to spread like the commercial versions. I filled a 670ml glass jar and still got left overs that I was planning to use for the baklava.
- Once the choco spread cools down, put in the fridge.
I tried the choco spread the next day for breakfast and to be honest, it tastes more like a chocolate mouse than a commercial choco spread.
In summary, quite happy with the result. I would like to compare with the commercial version but I decided that it wasn’t worth it. It is a quick recipe (apart from removing the skin from the hazelnuts) and you can use it as choco spread or mouse for dessert 🙂
Filo Pastry Ingredients:
- 500g plain wheat flour
- 250ml whole milk
- 100ml vegetable oil
- 10ml vinager
- 5g salt
- unti-stick mix: 200g thin corn flour + 100g plain wheat flour
Filo Pastry Process:
- In a bowl, add milk, oil, vinager and salt. Mix well. Then add the 500g flour. Mix again until all combined.
- Knead the mix on your work surface for 10 minutes or so until you have a smooth dough.
- Wrap up in plastic film and let it rest for 1h on your work surface.
- Prepare the anti-stick mix: combine the corn and wheat flour.
- Dust your work surface with the anti-stick mix.
- Divide the dough in 20 small pieces. Highly recommended to use a scale.
- Each piece, create a ball and let it rest in a baking try. Cover the try with a kitchen towel or plastic film.
- Then starts the “difficult” part. Pick one ball, use a bit of the anti-stick mix in your rolling pin and on the ball. Spread the ball in a circle around 13cm diameter or so. It should just a couple of moves in each direction. Then be generous with the anti-stick mix, as we need to create a stack of 10 pieces and it is critical so they dont stick. Put the first piece with anti-stick mix on top. And repeat the same process with other 9 balls.
- Once you have the 10 pieces together, you have to spread all of them at the same time. Again be sure you have plenty of anti-stick mix in your work surface, rolling ping, etc.
- Spread slowly in all directions, turning the stack, being careful that all layers spread equally.Likely you get up to 3 or 4 times bigger than the original form.
- Now you have to remove each layer from the stack. Be careful, it should be paper thin!
- In baking paper, with a layer of anti-stick mix, put each layer adding extra anti-stick mix on top. After adding the 10th layer, use another piece of baking paper and now roll everything together slowly. If you want to keep it in the freezer of fridge, then wrap the roll with plastic film.
- Repeat the same process with the final 10 balls.
- So at the end you end with two packets with 10 layer each.
Honestly, I failed miserably here. Just in the very beginning, I added by mistake 500ml of milk instead of 250ml. I was surprises of how wet was the dough… until I noticed my mistake. I decided to carry on, just doubling the amount (aprox) of flour. I didnt add extra vinegar neither salt. I think I should have done it…. Then finally I managed to knead the dough as per video and let it rest.
Then again, another mistake, I should have weight the balls as I ended with different size balls that then made different size (and thin) layer.
And final mistake, use plenty of anti-stick mix, so obviously, the layer dont stick when you try to spread the stack of 10 layers.
I couldnt remove any layer form the first stack so I decided not trying with the second stack. So this was my toolkit for baklava….
By the way, as I had a double dough. I left half of it in the fridge so I could decide if trying next day.
Chocolate Baklava Ingredients:
- 20 layer of filo pastry (as above)
- 250g of unsalted butter melted (1 cup)
- 1 cup of choco spread (as above) melted
- 1 cup of chopped hazelnuts (200g)
- 1 cup of honey
- 1/2 cup of chopped pistachios (optional)
Chocolate Baklava Process:
- Pre-heat oven at 175C.
- I used a rectangular baking glass dish. Use a bit of butter to spread in the bottom of it.
- Align all your filo pastries and try to get the form of your baking dish trimming with a sharp knife.
- Place one filo layer in the dish. Brush generously with melted butter. Repeat with another 5 layers, brushing the top of each sheet with melted butter.
- Drizzle 1/2 cup of the melted choco spread over the first butterd filo layers. Use a spatula. Sprinkle 1/2 cup of chopped hazelnuts. Drizzle 1/4 cup of honey.
- Layer 6 more sheets of filo over the choco spread, brushing each sheet generously with the melted butter. After the last buttered, drizzle the other 1/2 cup of melted choco spread, using a spatula. Sprinkle 1/3 of chopped hazelnuts. and drizzle 1/4 of honey.
- Add the last 4 filo sheets, buttering each one. Using a sharp knife, cut the baklava in even squares.
- Brush the remaining butter over the top the cut baklava. Sprinkle the rest of hazelnuts.
- Put in the oven for 30 minutes or until golden on top.
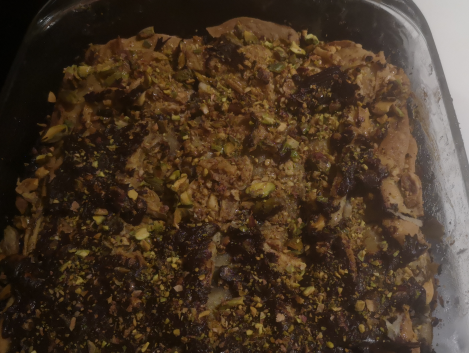
- Once removed from the oven, immediately drizzle the last 1/2 cup of honey.
- Add the chopped pistachios (optionally). Let is rest for 2 hours.
- Drizzle any left over choco spread (it has to be quite liquid – if solid again, use a bit the microwave)
- Let the choco spread to set and ready to eat!

To be honest, the taste was quite different from the other times I have done it with filo and choco-spread bought in a shop.
It tastes much less sweet (as I use much less sugar that the commercial version), I didnt use all the honey and the filo pastry wasnt the best. It wasnt very crunchy.
I tried again this morning, and it taste better.
I am happy with the result but I have room for improvement!!!
PD: The chocolate spread becomes a bit sour with the weeks in the bridge so you should eat it quick 😛