I am using GCP for EVE-NG but I dont have permanent public IPs for the VMs as it has a cost and they are not running all the time. I am not really bother about that but talking with a friend a couple of weeks ago he wanted to have a public IP to his home lab using a commercial broadband that obviously provides dynamic IPs. So I searched a bit and found different solutions and found this:
For my needs it is enough. It is free up to 5 domains. And you dont have to install any software in your systems. Just a cron job calling a basic script with one line.
The thing I don’t like. If you don’t pay with money… you pay with your data. You have to use an account from Twitter, Google, Reddit or Github. Fortunately I have an account from one of those services that I dont use so it has minimum data.
It is something I have never tried to bake. I consider it a very American/British thing. I have tried good ones in UK in Ben’s Cookies and it seems there is a great version in USA in Levain Bakery.
So searching for recipes, I chose this one:
Ingredients (adapted to what I have):
Plain flour 200g
Self-Raising flour 100g
100% cocoa powder 50g
1 teaspoon of corn flour
1 teaspoon of baking soda
1 teaspoon of baking powder
Half a teaspoon of salt

Cold butter 200g
Brown sugar 130g
White sugar 70g

2 free range eggs - beaten room temperature

300g 80% dark chocolate in pieces
20g of mixed nuts crashed
Process:
Sieve flour, cocoa powder, corn, baking soda/powder, and salt.
Cut the cold butter into a small cubes.
Chop chocolate tablets into small pieces.
In a big enough bowl, cream the butter and sugar. I do it by hand.
Add eggs in 3 separate steps, and keep mixing.
Add the dry ingredients (flour mix), and mix lightly until you still see unmixed flour.
Add chocolate pieces and nuts. Mix lightly.
Cover and move the dough to the fridge for 2-3 hours.
Weight 170gr of dough per cookie. Make a ball and place it on a tray.
Move the try to the fridge for 30 minutes in the fridge.
Pre heat the oven to 200℃ and bake it at 180℃ for 10 minutes.
Let them rest for 15 minutes or more until the surface is a bit hard. If not they will break down in your hand.
Veredict
Obviously, they dont look like the ones in the video or the other sites but they were good.
Difficult to believe, but they dont taste super sweet. I used 100% cocoa powder and 85% dark chocolate. Still one cookie has the amount of chocolate and sugar that I take in one week 😛
Reminder
You can put the rest of cookies in the freezer! And enjoy fresh baked cookies any day!!! (I had three left over)
Mistakes
They where in the oven for 13 minutes or more… so they flat out more than I wished.
They are very big cookies so make sure they have plenty of room. I only put four and one moved when I put the tray in the oven.
No, it is not me when I was a kid. It is a GC extension. I have a very bad habit of opening many tabs in my browser with the excuse, I will take a look later. That takes a big toll in CPU/Memory. With this extension, my laptop is running very smoothly even when I have three cEOS docker boxes running in the background. The fan runs less often. I have been using it for over a week and I am very happy with it. Need to find something for Firefox.
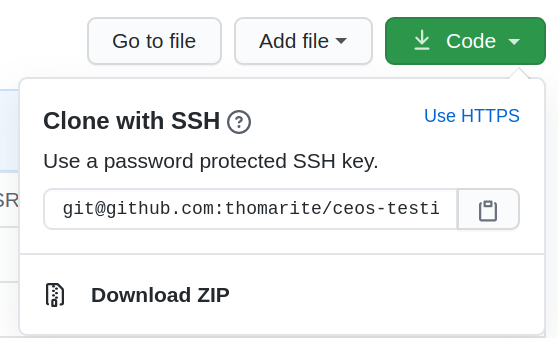
I had already a key that I wanted to use. So adding it to the repo was ok.
Testing it was my challenge. I was missing two things. My key wasn’t following the standard file name so it wasn’t used by my ssh-agent and then, i wasn’t using the “git” user when testing…. I was using my github username.
$ ssh-keygen -t ed25519 -C "your@email.com"
Generating public/private ed25519 key pair.
Enter file in which to save the key (/home/USERNAME/.ssh/id_ed25519): /home/USERNAME/.ssh/id_ed25519.github
1- You need to increase the logging of your sshd (destination – server)
server# vim /etc/ssh/sshd_config
LogLevel VERBOSE
server# service sshd restart
server# tail -f /var/log/auth.log
2- From client, just ssh as usual to the server and check auth.log as per above
Jul 3 14:17:55 server sshd[8600]: Connection from IPV6 port 57628 on IPV6::453 port 64022
Jul 3 14:17:55 server sshd[8600]: Postponed publickey for client from IPv6 port 57628 ssh2 [preauth]
Jul 3 14:17:55 server sshd[8600]: Accepted publickey for client from IPv6 port 57628 ssh2: ED25519 SHA256:BtOAX9eVpFJJgJ5HzjKU8E973m+MX+3gDxsm7eT/iEQ
Jul 3 14:17:55 server sshd[8600]: pam_unix(sshd:session): session opened for user client by (uid=0)
Jul 3 14:17:55 server sshd[8600]: User child is on pid 8606
Jul 3 14:17:55 server sshd[8606]: Starting session: shell on pts/7 for client from IPv6 port 57628 id 0
3- So we have the fingertip of the key used by client. Now we need to get the fingertips of our clients keys to find the match:
Nornir is a python framework mainly for network automation. Instead of using another tool like Ansible (that you need to learn), you can do the same just using pure python all the way. Ansible doesnt scale well and can be very slow, with nornir you have threading from day zero, so if you have to run tasks in 100 devices, you will feel and see the difference.
I learnt about nornir via Kirk Byers’ course. Unfortunately I didnt have the chance/time to use it in my former day job so now I have had time to review things and do a small project.
It is nothing special. The script builds the config for BGP or ISIS using jinj2 and yaml files. I have the feeling that my jinja2 is a bit difficult to follow. Then using napalm connects to the devices to push or check the config.
Just one issue, as it seems due to the nature of cEOS relaying on docker and my filesystem, if you decide to push the config (dry_run=False == commit=True) the task will fail (while trying to write startup config) but it is actually executed.
(testdir2) /testdir2/ceos-testing/nornir master$ python buid-config.py -b isis -c
hostname: r1
task: deploy_config for isis
failed: True
logs: Traceback (most recent call last):
...
File ".../testdir2/lib/python3.7/site-packages/pyeapi/eapilib.py", line 469, in send
raise CommandError(code, msg, command_error=err, output=out)
pyeapi.eapilib.CommandError: Error [1000]: CLI command 5 of 5 'write memory' failed: could not run command [Error copying system:/running-config to flash:/startup-config (Operation not permitted)]
changed: False
diff:

hostname: r2
task: deploy_config for isis
failed: False
logs: None
changed: False
diff:

hostname: r3
task: deploy_config for isis
failed: False
logs: None
changed: False
diff:
This shouldn’t happen on vEOS or the real hardware (if you have the correct aaa config of course)