Tarta de Zanahoria

This is not the typical “carrot cake”. I have some memories when my mother used to make this cake. I have tried to find the recipe in her papers a couple of times but never found it (I think). So I asked a very good friend of her about this recipe and lucky enough she had it so managed to take a picture of it. And finally this weekend I decide to try.

Ingredients:

  • 250g of sponge fingers
  • 400ml milk
  • 200g sugar
  • 150gr cocunut sherred
  • 500g peeled carrots
  • 1 tin of 1L aprox

Process:

  • Boil the carrots in a sauce pan with just a 2 fingers of water. Check from time to time that there is enough water and they dont stick to the bottom. If they do, just add some water and scrap the bottom. It is the sugar from the carrots so it is good.
  • Once the carrots at soft enough so a fork can easily go through them, remove from the heat. Remove all the water with a sieve or strain.
  • Put the carrots, milk, sugar and 100g of coconut in the food processor. Mix until all combined like a cream.
  • In the tin, cover the bottom with a layer of sponge finger. Then add some carrot cream slowly so the fingers dont move. Press a bit with your hand so all cream gets into the sponges. Add another layer of sponge finger, add another layer of carrot cream. Add a third and final layer of sponge fingers and carrot cream.
  • Put the tin in the fridge for 3-4 hours.
  • You can remove the cake from the tin if you want to present to people. Then add the rest of the coconut on top. You can add some berries on top optionally.
  • Optionally, you can just spread the rest of coconut on top of the tin.
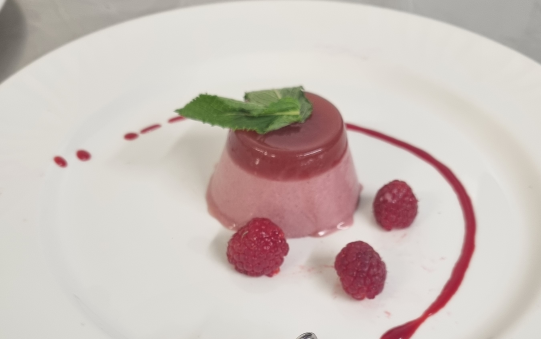
This is the resut:

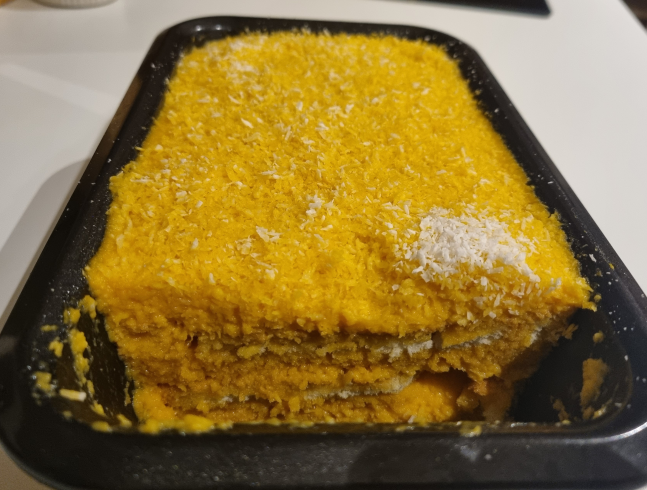
It is quite tasty and really simple. The only “difficult” ingredient maybe is the coconut shreds and find the sponge fingers.

And to be honest, looks like a carrot “tiramisu” 🙂 And although it is a nice cake somehow it is not what I have in my memory. Anyway, I will keep this recipe.

VXLAN BGP EVPN Multisite

This is a video that explains high level about EVPN Multisite. There is no really config involved. The pdf for the session “BRKDCN-2913” is easy to find and download. Although this is NXOS based, Arista has similar feature called “EVPN Gateway”:  https://www.arista.com/en/support/toi/eos-4-25-0f/14591-evpn-l3-gateway (needs registration….) Just one line really to add under the EVPN address family to change the next hop to the gateway’s address. The implementation looks much more simpler than NXOS….

This is a summary of the video:


RFC9014 … DCI EVPN Overlay defines the Layer-2 extension between two domains

section 3: decoupled gw. vland handoff with a WAN edge.
section 4: integrated gw: gw talk directly L2EVPN
multi-site (BESS version) draft-sharma-bess-multi-site-evpn. support extension of l2 and l3, uc and mc, vpns. BGW talk ebgp evpn AF.
gw mode: anycast vip (ecmp: underlay) or multipath vip (ecmp: under and overlay)
type5: re-originated.
RD: separate RD for vIP and PIP
RT: same for intra/inter dc
Border GW = EVPN GW

EVPN-IPVPN interop defines the Layer-3 extension between domains, currently lacks of EVPN to EVPN interconnects

Multisite draft combines RFC9014 and EVPN-IPVPN with EVPN to EVPN connection: https://datatracker.ietf.org/doc/html/draft-sharma-bess-multi-site-evpn-02

Use cases:
1- Compartmentalization:

  • multiple fabrics, single DC
  • control at BGW: allow extension l2,l3. Reduces remote VTEP count. Expands VTEP scale.
  • BUM packet: LS replicated only in the fabric, then BGW to the BGW in the other fabric. In no multi-site, LS replicate to ALL VTEP in the fabric.

2- Scale

  • control at BGW: Reduces remote VTEP count. Expands VTEP scale.
  • scale thhrough hierarchy: multiply vtep with sites
    up to 128 sites per multi-site domain. Up to 256 VTEP per fabric -> 32768 VTEPs

3- DC interconnect (DCI)

  • IP reachability and MTU.
    integration with legacy networks:
    hybrid cloud connectivity: extends l3 with vrf awareness.

Deeper look:
HW support only important in BGW. LS is not important.

tunnels:

  • stitched at BGW (no recirculation, hw rate)
  • intra fabric tunnel goes LS to LS or LS to BFW
  • inter fabric tunnel goes BGW to BGW
  • only BGW IP must be unique.. Fabrics are “separated”.

BGW deployment considerations:

  • 1) anycast bgw
  • – up to 6 nodes. They are not interconnected, just share ASN nothing else.. In LS or SS
  • – VIP mode: vip for tunnel stitching. foucs on scale and convergence. overlay ecpm
  • – PIP mode: for 3rd party interop. Uses PIP for tunnel stitching. Uses under and overlay Ecmp.

  • 2) vpc bgw:
  • – only 2 (because vpc, peer link). Only in LS
    – legacy network integration, attachment of fw and adcs.

NOTE: anycast and vpc must have a multi-site vip and PIP. only vpc needs an extra IP for VPC IP.
PIP needed for establishing BGP and for Designated Forwarding election (only one BGW forwards per vlan.

CP and DP:

  • As eBGP uses betweem multi-sites -> ebgp changes NH => vxlan tunnel termination and re-origination + loop prevention (as-path). Full mesh ebgp evpn between sites.
  • underlay/overlay CP deployemnt: recommended IEI (recommended) within fabric: IGP as underlay, iBGP as overlay.
  • full mesh ebgp evpn between site OR deploy RS (route-server) -> RS is in a separate AS and only does CP = eBGP RR (RFC 7947): evpn routes reflection, NH unchanged, RT rewrite!

I think this is the white paper mentioned:  https://www.cisco.com/c/en/us/products/collateral/switches/nexus-9000-series-switches/white-paper-c11-739942.html

Another thing, I wish it wouldnt be that painful to simulate NXOS. It is so easy spin up a lab with cEOS…..in a standard laptop..

Pollo en escabeche

I like a lot “atun en escabeche” but it is really difficult to find. And to make it, quite expensive… So during a conversation, a friend of mine, mentioned “pollo en escabeche” as vey tasty dish with similar flavour to “atun en escabeche”. So I decided to give it a go and find a recipe. This one looked very good.

Ingredients:

  • 400g chicken breast
  • 1 big onion sliced
  • 2 large carrots sliced
  • 3 cloves of garlic
    • 1 glass of white wine
    • 1 bay leaf
    • 15 pepper corns
    • 1 glass of vinegar (white wine, apple, etc)
    • 1 glass of water
    • salt + pepper

Process

  • Salt and pepper the chicken breasts.
  • Fry the chicken in a hot pan until golden outside. Put apart.
  • In the same pan, add the onions, carrots and garlic. Fry until soften, aprox 4-5 minutes.
  • Add glass of wine, bay leaf and pepper corns. Keep the high heat so the alcohol evaporates.
  • Then add the glass of vinegar and water.
  • Add the chicken back in.
  • Cook at high heat for 15 minutes so the liquid evaporates a bit and the chicken absorbs some juice.
  • Remove from the heat and pout the content of the pan into a glass dish.

Ready to eat!

Very easy, quick and tasty!

Brioche

After the positive experience with Babka, I wanted to try Brioche. I did all kneading by hand. All videos I have seen use a machine. It took me 1h aprox to do all kneading and adding the butter but it was so worth it to see that I was able to achieve a dough that stopped being sticky, smooth and glossy.

Ingredients:

  • 500g strong white flour
  • 12g fine sea salt
  • 30g caster sugar
  • 8g dry yeast
  • 6 eggs (1 egg aprox 50g)
  • 250g softened unsalted butter. Chopped in small cubes.
  • 1 egg yolk for glazing

Process:

  • Put flour, salt and sugar in a bowl and mix. Then add the yeast and mix well.
  • In another bowl, break all eggs, whisk them and then add them to the flour making a well in the center.
  • Mix all ingredientes with one hand, once it comes together, tip the dough on the work surface. Dont add any flour!
  • Use one hand for kneading and the other for the scraper.
  • With the heel of your hand, push the dough into the table and stretch and tear until it stops being sticky. Use the scrapper to get the dough together and clean your dirty hand. Aprox 10 minutes.
  • Let the dough rest 5 minutes
  • Now, add slowly the butter to the dough in small batches. I did 6 batches… So stretch the dough a bit and add some cubes of butter, try to “integrate” them in the dough with your dirty hand. Always keep the clean hand with the scraper. Then start to stretch/tear the dough. It will become a bit “wet” with the butter but will come together again, and will not stick to the surface after some minutes. It is amazing to see that happening. Repeat the process until all butter is added in the dough.
  • At the end, the dough should no sticky to the table, should be glossy, smooth and elastic.
  • Put the dough back in bowl. Cover and leave at room temperature for 2h or until has doubled in size.
  • Knock back the dough, cover again and put back in the fridge until next day.
  • Next day, line a tin with baking paper or grease it. I used a big tin. You can divide the dough in two if you have smaller tins.
  • Take the dough and divide in 3 pieces. Aprox 360g each. Round each piece gently. Then roll each piece a bit longer than your tin.
  • Time for the “plait”. Join the three ends together, then plait by lifting the middle strand and putting the right strand in the middle. The “lift” strand moves to the right and release it. Now lift again the middle strand, take the left strand and put in the middle. The “light” strand moves to the left side and release. Repeat again the same process, lift middle, move right, lift middle, move left. Until you dont have more to braid. Pinch the ends.
  • Place the brioche in the tin and leave to rise for 2h aprox or reaches the top of the tin.
  • Pre-heat the oven at 180C.
  • Glaze the brioche with the egg yolk.
  • Put the brioche in the oven and lightly spritz the oven with a water spray.
  • Bake for 20 minutes. Then remove from the tin and bake another 5 minutes or until golden brown.
  • Take from the oven and let it cool for a couple of minutes (if you can)

And really happy with the result!

As mentioned earlier, I was quite surprised that I managed again to tame an enriched dough. Still I can improve it:

  • I did 4 strands but I have realized that 3 is better and easier to braid…..
  • I should have used more egg yolk for the glaze.

Raspberry Bavarois

Ingredients for glaze:

  • 75g raspeberry puree
  • 75g stock syrup (37g sugar + 37g water)
  • 2 leaves of gelatine

Process for glaze:

  • Prepare the stock syrup. In a sauce pan, boil the water + sugar. Remove from heat.
  • Soak the gelatine leaves in cold water
  • Heat up the stock syrup and add the softened gelatine. Mix well.
  • Add the raspberry puree to the pan, whisk for 30sec, remove from heat and let it cool down.
  • Pour the glaze into the base of the plastic moulds.
  • Put in the fridge.

Ingredients for bavarois cream filling:

  • 125g raspberry puree
  • 50ml milk
  • 2 egg yolks
  • 15g caster sugar
  • 1.5 gelatine leaves
  • 75ml double cream

Process:

  • Heat lightly the raspberry and milk in a saucepan
  • In a bowl, whisk the egg yolks and sugar
  • Pour the boiling milk into the egg mix and whisk well.
  • Return the mix to the heat and stir for a minute or less. Doesnt have to thicken up!
  • Add the gelatine, mix well.
  • Remove from heat and sieve the mix, leave it to cool down.
  • Whisk the cream to soft picks
  • Fold the soft picks into the raspberry cream.
  • Pour the cream into the moulds and put back in the bridge for 30 minutes.
  • Presentation. Take the moulds from the bridge, to unmould, put the moulds into hot water for a couple of seconds. Then with a sharp knife, make a cut on the base of the mould. Decorate with some mint leaves, cream and fresh red berries.

Babka

This is a enriched dough that I tried some time ago but I wanted to test again. I find this kind of dough quite challenge as it is very messy kneading by hand, but, this time, somehow I managed to get a dough that was smooth, glossy and elastic! It took 45m aprox I think. This is a video to give an idea (although it uses a hand mixer…. I can’t find one with kneading by hand.)

Ingredients for dough

  • 275 strong white flour
  • 6g salt
  • 30g caster sugar
  • 2 medium eggs (75g)
  • 100g milk
  • 4g dry yeast (8g if fresh)
  • 100g butter

Ingredients for filling:

  • 100g dark chocolate
  • 50g butter
  • 1 egg
  • 50g caster sugar
  • 15g cocoa powder
  • eggs wash + flour for dusting

Ingredients for sugar glaze:

  • 100g sugar
  • 80g water

Process:

  • Put all ingredients apart from butter in a bowl. Mix all until combined
  • Tip the dough into a table, without flour, using a scraper with one hand and kneading with the other for 5 minutes. Very important, use one hand for kneading so at least one hand is “clean” and it uses the scrapper. Let the dough rest for 1 minute.
  • Add 1/3 of butter each time and knead until fully combined all butter. This can take a LONG time if doing by hand. I used constantly the scrapper because it was very messy and sticky the dough. Be patience and dont use flour, the dough, surprisingly will start forming gluten because the kneading and will be smooth and stop being so sticky.
  • Once the dough is smooth, glossy and elastic, put it in a bowl and let it prove until double in size. Cover it during that time.
  • Knock the dough and put back into the bowl and keep it in the fridge overnight.

Next day

  • Prepare two tins of 20-25cm long. Line them with baking paper.
  • Remove dough from the bridge. Place it in a lightly floured surface.
  • Prepare the chocolate filling. Melt the butter and chocolate at “bain marie”
  • In another bowl, mix egg, sugar and cocoa powder. Whisk until you get a smooth paste.
  • Add melted chocolate to the paste. Whisk until well combined. Keep in mind you will have to “spread” this mix in the dough, so you dont want something two “hard”.
  • With a floured rolling pin, roll the dough into a rectangle of aprox 40x45cm.
  • Spread the chocolate mix evenly over the dough. Leave 1-2 cm free in the edge nearest to you as we will seal the dough there.

  • Start rolling the dough from the farthest edge from you. Create a tight roll, moving towards you. The seal of the dough should be under side and the smooth side facing up.
  • Dust lightly the top of your dough and with a sharp knife, cut the dough in half lengthways to show the inner layers

  • Each half will be a babka. Form a U shape with each one. Staring with the right side, bring this over the left and place down, then repeat, bringing the right side over the left to form a basic plait.
  • Place each babka into a tin and let it prove for 1h (ie: put in a oven with ligh on and some boiling water to make humid)
  • Preheat the oven at 180C.
  • Eggwash the babkas and bake for 28-30 minutes or until golden brown.
  • Prepare the sugar glaze. Place the sugar and water in a saucepan at medium heat. Stir until sugar is disolved. Bring the mix to the boil, leave it to simmer for a couple of minutes until thickens a bit. Remove from the heat and leave to one side.
  • Remove the babkas from oven and brush with sugar glaze. This is very important to make the babka moist inside.
  • Let is cool down in the tin.

In general I was quite happy with the result.

Some improvements/mistakes:

  • My sacket of yeast was already open so I think it “lost” it strength because my dough and babka didnt really prove….
  • My chocolate spread was a bit too hard and couldnt spread properly, maybe adding a bit more egg to make it a bit more runny?

BTW, this blog is quite good for shaping.

The New Silk Road

I finished the second part of “The Silk Road” book. It is mainly focus between 2005-2009 and the Trump administration. It is a bit of the same but more up to date with the push from China to “build” the new silk roads and the challenges, like USA rejection. It shows all the chaos caused by Trump and how easy made the life of Russia, Iran, China etc. The same for using tariffs to stop trading as middle-long term, the other side is going to win. This reminds me the “Chip wars”. As well, there are countless examples of agreements for investment between countries of the Middle East and Asia. Something that, from a western point of view, we dont really have visibility or ignore plainly. The summary, based on the author, is the world center is moving to Asia although in EU/USA we dont want to believe it or look at it. I think it is time of opportunities but nothing is perfect. Personally, each empire lasts less and less so how much we will see of China as leader at some point.