I received as a gift this book for Christmas and I was told his torta de laranja was very famous in Portugal. I have never cooked this cake before so for NYE dessert I changed my mind and decided to try this cake. I have tasted it in Portugal before, and to be honest it was never my favourite. I prefer the “algarroba” (carob), almonds, etc cakes. But, I wanted to see if all the hype was worth it.
One of the things that strike the most is how simple is the recipe in the book, few ingredients and steps. Still I didn’t feel confident and tried to find a video. This one was longer but made me doubt as it was using a bit of butter. As well, I wasn’t clear about how to do bain marie in the oven. This video was shorter and could see some other details regarding the bain marie (I was overthinking it) and spreading some sugar after taking out the cake from the oven.
Ingredients:
- 500g sugar
- 50g plain flour
- 15g dry yeast
- 2 big good oranges (zest and juice)
- 12 eggs
- Knob of melted butter
Process:
- Pre-heat oven at 220C
- Use a bit of butter and spread in the baking tray. This helps the baking paper to keep flat. Then add oven-proof baking paper. Spread a bit of butter on top of the baking paper. This avoids the cake to get stuck to the paper and it easier to remove after baking.
- Mix dry ingredients in a bowl: sugar, flour and yeast.
- Add orange zest and juice, mix
- Add the 12 eggs. Mix well.
- Add the rest of melted butter. Mix well.
- Poor the mix into a baking tray.
- In another tray, add water and get the tray in the bottom of the oven. This will make the bain marie.
- Put the cake tray above the water tray in the oven. Bake for 20-25 minutes. Till the top is golden.
- Remove the cake from the oven. Spread some sugar on top while hot.
- Get another piece of baking-proof paper. Turn the cake into that piece of paper.
- Remove carefully the paper from the cake.
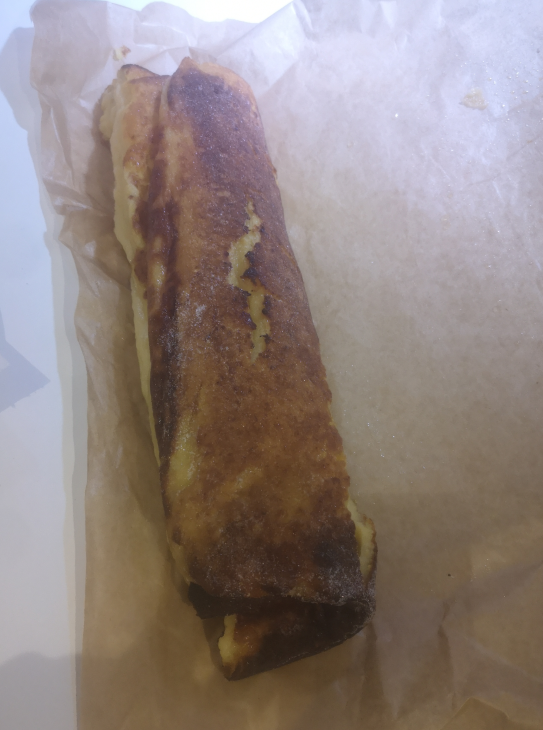
- The cake is very hot, and in theory you should try to roll it now using the baking paper you have. Like in the videos, bend one side, and roll.
- Cut a slice from each side to make look nice. Then let it cool down.
- Enjoy!
Mine was a bit too long in the oven and cracked in the middle. And as well, when rolling, it was superhot and a bit too thick and broke it even more during the process.
As well, I have always heard that orange and chocolate mix very well. So as I had a bit of home made chocolate spread, I decided to cover half of the torta with it. Maybe this is heresy 😛
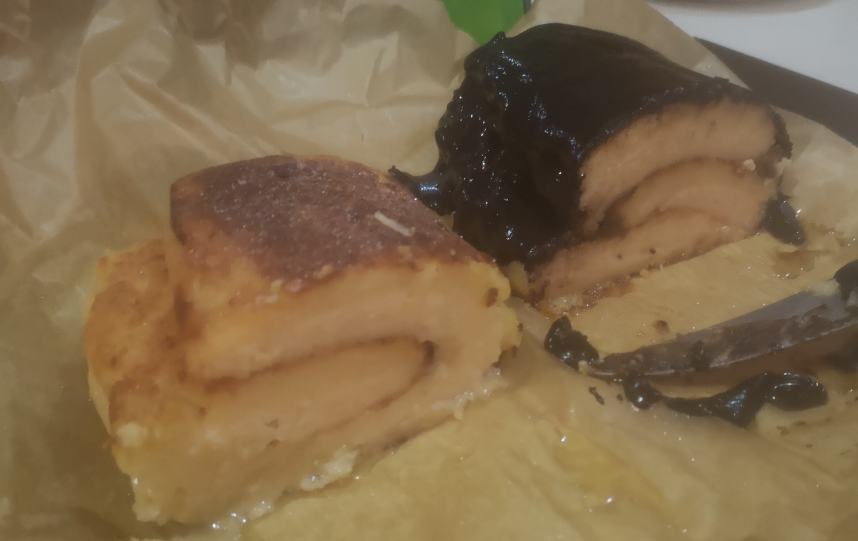
And to be honest, my friends like it!
It is a very calorific cake: 500g of sugar! But was nice. Another thing, I had issues with the oranges. I couldn’t find proper oranges so I used “good” orange pressed juice with one orange I brought from Portugal. Still tasted good.