Katmer

I love bread and I watch a lot of videos about cooking that come up randomly. And this one is something that caught my attention. This looks like it is a typical fried bread or pancake in central Asia. The video shows the Turkish version so I decided to give it a go:

Ingredients:

  • 2 glass of plain flour
  • 3/4 glass of water
  • 1 tsp of salt
  • 1/2 tsp of sugar
  • 75g butter melted
  • 1/4 glass vegetable oil

Process:

  • Mix salt and sugar in water. Add the water the flour and mix all well together.
  • Knead for 5 minutes. Let it rest and then knead again for a couple of minutes. Rest again for 15 minutes.
  • Knock the dough and form a rounded ball. Cut in four pieces and then each piece in two. In total you will have eight pieces. You can make it bigger though.
  • Round each dough ball and let is rest in a floured surface.
  • Mix the butter and vegetable oil.
  • This is the difficult part and is better to watch the video a couple of times. Be sure you have your surface properly floured (I am not used to) for the next step.
  • Using a rolling pin, try to make the thinnest layer you can, if rectangle shape, the better. Then spread some butter mix on it. Fold one third from the right side, spread some oil, fold the other third on top of the oiled one. Oil again. You should have a rectangle. Fold a third from the bottom, oil and fold finally from the top. You should have like a handkerchief .
  • In a medium/hot pan, with just a bit of oil, fry each unit until golden/crispy each side. If you are good, it will bubble up! (just a bit in my case)

It took me a bit and I struggled with rolling pin as I am not used to this kind of dough. But the result was good, very crispy! (I need much practice to reach the level of the video)

Brisket

It is funny but after reading that eating beef doesnt help the planet, last week I decided to cook brisket and bought a 5kg piece…. I am a bit a hypocrite right now. In general I dont eat much meat but it is done.

So this desire came from one visit to a BBQ restaurant some time ago. And I wanted to try at home with my oven. So I found this recipe that looked good to follow.

Ingredients:

  • 2.5kg brisket
  • salt, pepper, paprika, brown sugar, garlic, spices for the rub
  • 2 onions and 2 potatoes
  • 1 can of beer (or 200ml wine)
  • 1 litre of beef stock
  • foil

Process:

  • Combine all spices. Be sure the brisket is not too wet, so you can spread the spices properly in the whole piece.
  • Let the meat rest (marinate). Put it in foil in the fridge.
  • In a big hot pan with a bit of oil, seal the brisket. Then fry the onions at medium heat.
  • Add the beer to the onios until soft.
  • Move the onions to a oven try, add the brisket and sliced potatoes.
  • Add the beef stock.
  • Cover in foil the tray and put in a pre-heat oven at 175C for 4.5-5h.
  • After long wait, take the tray from the oven and remove the foil.
  • Let the meat to rest for a bit

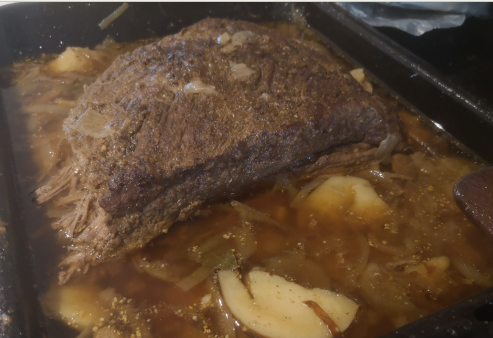
This was my result:

It wasnt like in the restaurant but actually it was like some beef stew I used to have as a kid. Good lunch for a long week…

Timballo di Riso

Some years ago I went to this restaurant. We had a nice meal and I remember I tried something totally new: “Timballo di riso”. It was super tasty, it wasn’t a normal risotto (that still I haven’t master it…) and it wasn’t a pasta dish. So I only managed to take a picture of the ingredients, because I finished it too quick. Since then, I had it into my to-cook list but finally I decided to try after checking some videos. This was the source for my attempt.

Original Ingredients:

  • Arborio rice, saffron, Béchamel sauce (milk, nutmeg, salt, butter, whipping cream, flour type 00), Vegetal broth ( celery, carrots, onion, broccoli, zucchini), Fontina cheese, ham, Parmigiano Reggiano cheese, salt

My ingredients:

  • Glass of risoto rice.
  • 2 glasses of boiling water
  • 1 cube of stock
  • 100g of butter
  • pinch of saffron (or similar)
  • 2 bay leaves
  • bechamel / white sauce:
  • – 50g butter
  • – 1/2 glass of flour
  • – 2 glass of milk
  • – nutmeg, pepper and salt
  • 250g cure ham cut in small pieces.
  • 1 mozzarella ball
  • chopped parsley
  • grated Parmesan
  • breadcrumbs

Process:

  • In a big pan and medium heat, put the boiling water, stock cube, butter, saffron and bay leaves.
  • Once all mixed, add the rice. Let it cook at low heat until it gets dense. Stir from time to time to be sure it doesn’t stick.
  • Let the rice to cool down in a try.
  • Prepare the bechamel sauce. In a pan, melt the butter, add the flour. Once it is combined like a brown paste, start adding milk bit by bit. It should start to form a sauce. Add nutmeg, pepper and salt. Keep adding milk. At the end you should have a creamy tasty sauce.
  • Put the ham and shredded mozzarella with the bechamel. Add the parsley.
  • Add the rice to the bechamel mix. Combine everything. Add the mix into a ovenproof glass dish.
  • Top the dish with a layer of grated Parmesan and then another of breadcrumbs.
  • To the oven at 180C until golden on top (20 minutes)

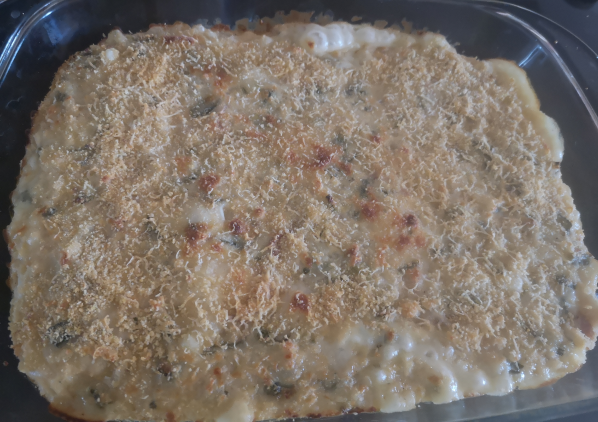
Here we go!

To be honest, I don’t remember the taste so I can’t compare but it was good. It is like a risotto without mushrooms but with cheesy bechamel!

So again, I liked it, I enjoyed cooking and had a good lunch for the work days! I don’t need much more (enjoy my job?)

Cocido

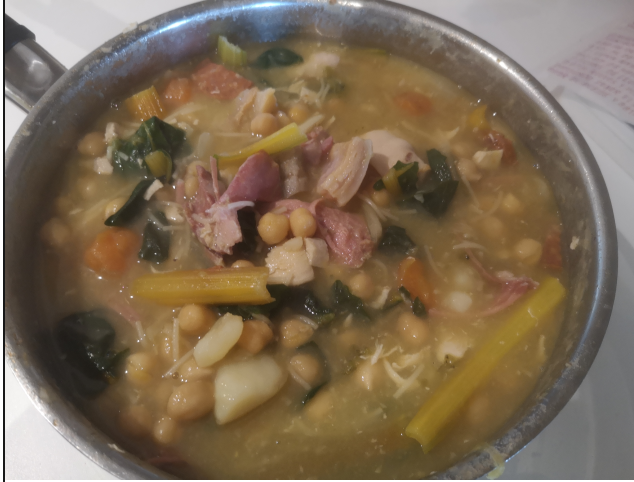
I have done some lentils and beans stew before haven’t tried chickpeas stew “cocido” before. And I fancied a good homemade cocido soup! So as I had my last piece of cure ham in the freezer, I went for it. This is a proper cocido, but I used the ingredients I had at hand and the result was very tasty. That’s what matters to me.

Ingredients

  • 1 piece of cure ham
  • 1 chicken breast sliced
  • 1 portion of chorizo
  • 1 potato
  • 1 cup of chickpeas cover on water from the day before
  • 1 onion
  • 1 carrot
  • 2 cloves of garlic
  • Salt, pepper
  • Paprika (pimenton!)
  • Some greens: I used chard
  • 2-3 handfuls of fideos

Process

  • Get a big pan, put all ingredients apart from the greens and fideos
  • Fill the pan with boiling water. Put the pan at medium heat until start boiling. We want plenty of liquid for the soup!
  • Reduce heat till simmer. Stir from time to time for 1 hour of so.
  • Taste the liquid, it should have a strong flavour. If the potatoes, chickpeas and carrot are soft, we are nearly done.
  • Add the green and fideos. Stir for couple of minutes until the fideos are cooked. The greens will boil and keep a nice color.
  • Shred the ham so it releases all juices. Mix all together

All done, it is quite easy. And had a tasty lunch for the work week!

Hot Chocolate

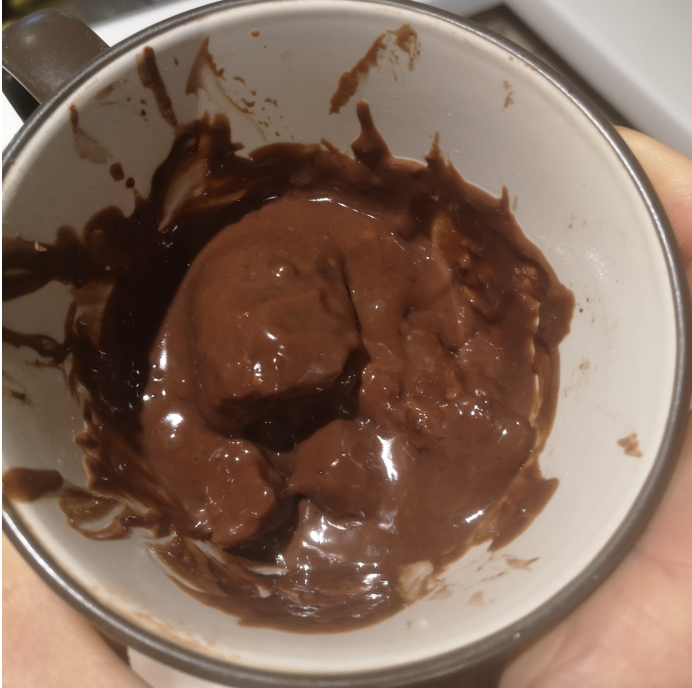
When making hot chocolate at home, I used to use the pre-mix thing, the result was good. But this time, I wanted to make it from scratch and get the final hot chocolate I like when as a kid bought “churros”: thick, delicious hot chocolate.

So I have tried several methods, but I made my best result based on this video. Easy ingredients, easy process. Great result!

Ingredients:

  • 1/3 cup of plain flour
  • 1/3 cup of 100% cocoa powder
  • 1/3 cup of sugar
  • 2 cups of milk

Process:

  • Mix all dry ingredients in a bowl.
  • Add the milk to the dry ingredients and mik well.
  • Put the mix at medium hit and stir from time to time. It will start to thicken up in 15 minutes or so. Be sure it doesnt stick in the bottom of the pan.
  • Taste it, you may add some spoons of cocoa if it is too sweet.
  • Once it is thick for your taste, remove from the heat and enjoy!

As a kid, sometimes I used hard bread with my chocolate. Good memories today!

La Viña

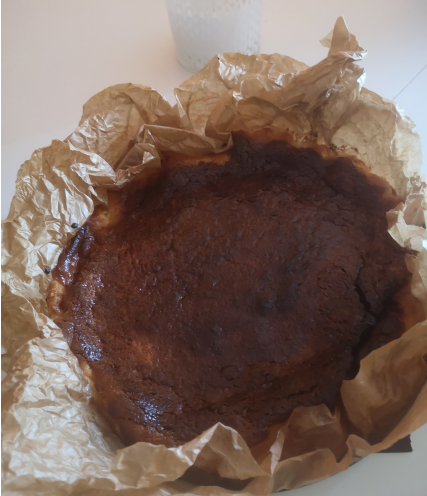
I was getting many video recommendations about this type of cheesecake. So I gave it a go:

Ingredients:

  • 4 big eggs
  • 500g cream cheese
  • 250g double cream
  • 200g sugar (I used 150g)
  • 1 tsp plain flour

Process:

  • Pre-heat oven at 200C
  • Mix cream cheese and sugar.
  • Add eggs and mix
  • Add double cream and mix
  • Add flour and mix
  • Use two wet pieces of baking paper into a round mold.
  • Pour the mix into the mold
  • Bake for 40 minutes or until quite brown on top.
  • Let it cool down for a bit and then put into the fridge for a couple of hours.

The recipe is quite easy and quick. To be honest, it tastes good, even better the next day. Best cheesecake ever? Don’t care, but I need to compare with the cheesecake I used to bake.

Turkish Veggie Pizza

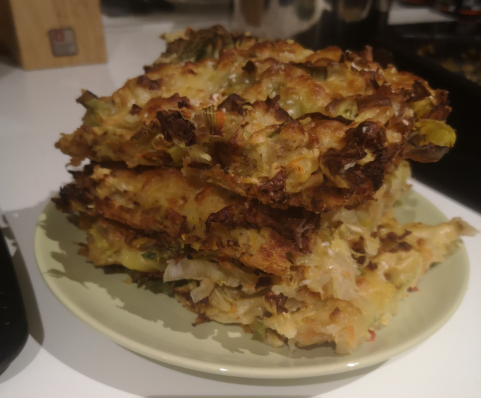
To be honest, I dont know how to translate it, but I found the video randomly and gave it a go. Quite happy with the result.

Ingredients:

  • 4 potatoes
  • 1 leek
  • 2 carrots
  • 100 grams of spinach
  • 1 red pepper
  • 4 medium eggs
  • 4 tablespoons of olive oil,
  • 4 tablespoons of milk
  • 4 tablespoons of flour
  • 1/2 pack of baking powder
  • 2 teaspoons salt, peppe
  • 50 grams of grated cheese
  • Sesame seeds

Process:

  • 1) Slice the leeks, red pepper and spinach. The add the potatoes and carrots grated. Mix all together.
  • 2) In a bowl, whisk the eggs with the oil. Add the flour and whisk. Add the milk and whisk. Add the baking powder and whisk. Add the salt and pepper and whisk.
  • 3) Pour the butter into the veggie try. Mix everything. Try to flat out the mix as much as you can.
  • 4) Put the try in a pre-heat oven at 180C for 25 minutes.
  • 5) Remove from the oven and add the cheese and sesame seeds. Put back in the oven until cheese forms a crust.
  • 6) Remove from oven and let is cool down for a bit. Then cut in squares.

Mine was a bit thick, but nonetheless, very good!

Gnocchi

I wanted to make a gnocchi dish for some time. I had a recipe at hand so I went for it. I used this video as a based for the gnocchi

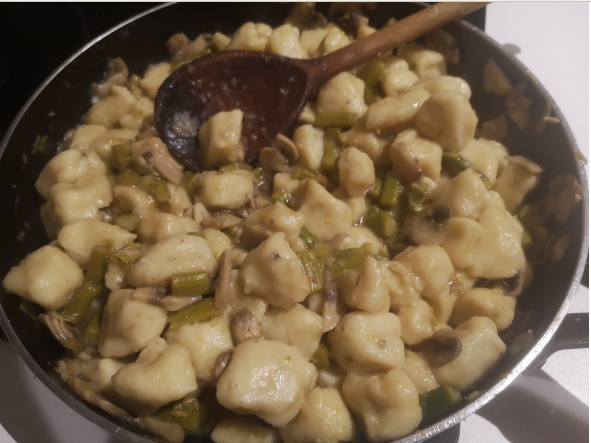
Gnocchi in mushroom and asparagus sauce.

Gnocchi:

  • 1kg of boiled potatoes
  • 2 medium eggs
  • salt/pepper
  • 20g Parmesan cheese
  • 150g plain flour plus dusting

Mushroom and asparagus sauce:

  • a couple of garlic cloves
  • 200g mushrooms
  • 150g asparagus
  • 1/2 cup of white wine
  • 1 cup of chicken stock
  • Parmesan cheese
  • optional: lemon zest

Gnocchi Process:

  • 1) You can boil or bake the potatoes. Let it cool down a bit until you can manage with your hands. Keep the water for next steps.
  • 2) Put in a bowl, use a potato smasher to break them a bit.
  • 3) Add the eggs, salt, pepper and cheese. Mix a bit .and then
  • 4) Add the flour. You should get a ball. Be sure everything is properly combined.
  • 5) Get a saucepan with boiling water and salt from the first step.
  • 6) In your work surface, dust it with flour, device your dough in several parts. Roll each one until you have a flaute form. Add flour if it sticks too much. Cut them in small pieces
  • 7) Boil the gnocchi until the float. Remove from water and let them cool down in a try (put some olive oil so they dont stick to it)

Sauce Process:

  • 1) Fry the garlic in a sauce pan
  • 2) Add chopped mushrooms and asparagus. Salt and pepper. And other herbs you fancy
  • 3) Once the veggies are fried (medium-high heat), add the wine. It should evaporate quickly and form some brown bits in the pan.
  • 4) reduce heat, add the chicken stock. Stir from time to time until thickens a bit.
  • 5) Add the gnocchi to the sauce, with some pasta water. Be sure they are fully coated.
  • 6) You can fry a bit the gnocchi, be sure there is sauce left!
  • 7) Optional, add a bit of lemon zest.
  • 7) Remove pan from the heat, and let cool down for a bit. Ready to eat!

I was surprised by the gnocchi, they were much better than the ones you buy. It was like small dumplings balls! Very tasty.

Lamingtons

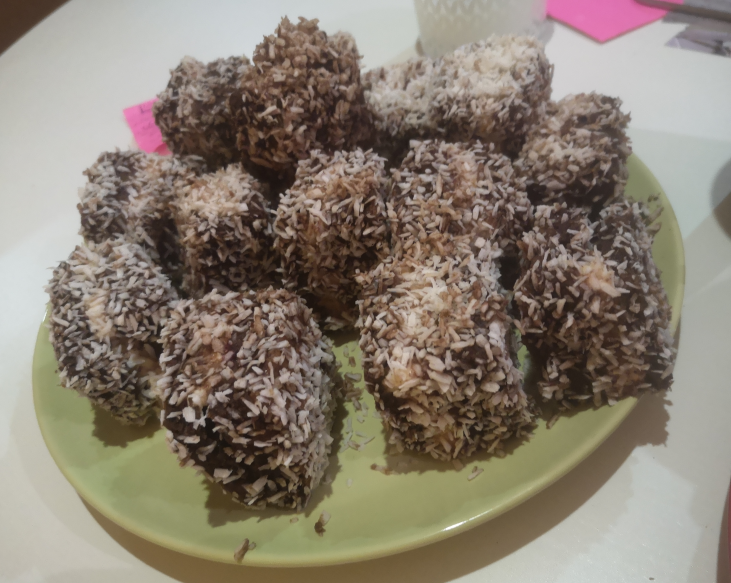
It seems this is a typical Australian desert.

Sponge:

  • 250g golden caster sugar
  • 250g self raising flour
  • 1/2 tsp salt
  • 125g butter softened
  • 3 medium eggs
  • 3 tsb milk

Filling:

  • 2 tsp icing sugar
  • 250g double cream
  • 200g jam (any red berries are nice)

Coating:

  • 50g cocoa powder
  • 200g icing sugar
  • 80g butter melted
  • 200g milk
  • 200g desiccated coconut

Process:

  • 1) Pre-heat oven at 200C. Grease a baking try
  • 2) In a bowl, cream the butter and sugar.
  • 3) Add the eggs, one at each time. Only add the next one when is everything is properly combined
  • 4) Add the flour, milk and salt until fully combined. Pour the mix into the baking try.
  • 5) Bake for 20 minutes or until golden. Use a knife and be sure it comes up clean. Set aside to cool down
  • 6) Filling: In a bowl, sift the icing sugar and add the double cream. Mix with a hand blender until thick.
  • 7) Once the sponge is cold, slice it horizontally. In one side, pour the filling (use a spoon through boiling water to help you to spread it easier).
  • 8) On top of the filling, pour the jam, use again the spoon through boiling water.
  • 9) Sandwich the sponge back together. Let is chill in the fridge while preparing the coating.
  • 10) Whisk together the melted butter and milk in a bowl. In other bowl, sieve the cocoa powder and icing sugar. Bit by bit, add the cocoa/sugar mix to the butter mix. Whisk until no lumps.
  • 11) Cut the sponge in squares, dip each square in the cocoa mix until properly coated. Then roll in the desiccated coconut. Put aside.
  • 12) Once all squares are done, sprinkle some more coconut.
  • 13) Let the cocoa coating to settle for 1h. But next day are even better!

Cornbread

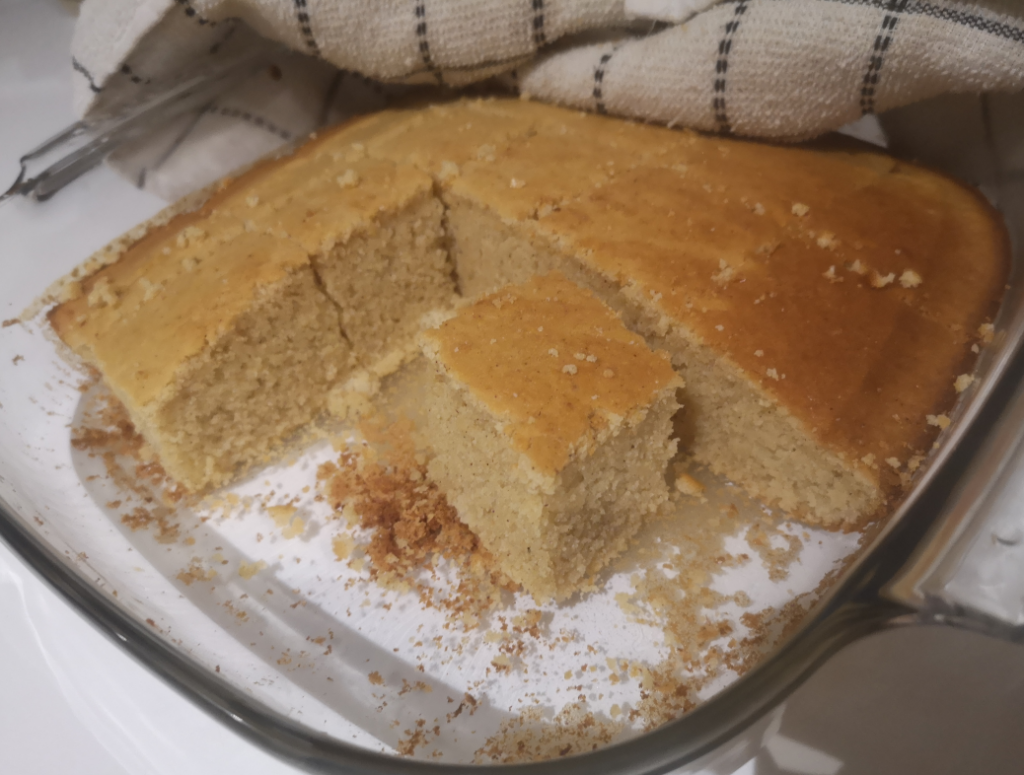
This is something I wanted to try from sometime. It is not my typical bread. I think I tried first time in a BBQ restaurant. I followed this recipe.

Ingredients

  • 120g butter
  • 1/2 bunch fresh sage + 1/2 bunch fresh thyme ( I used dried herbs I didnt have fresh)
  • 180g plain flour
  • 50g sugar
  • 3 heap tablespoons light brown sugar
  • 6g fine sea salt
  • 1 tablespoon baking powder
  • 180g yellow fine corn meal
  • 2 eggs
  • 350ml buttermilk ( I used milk + 2 tsp of white wine vinegar as I didnt have this)

Process

1- Brown the butter in a hot pan. Retire add the herbs.

Preheat the oven at 200C

2- Mix all dry ingredients.

3- Whisk the eggs, add the buttermilk, then add the butter.

4- Pour the wet mixture into the dry mixture. Combine until there are no lumps.

5- Pour the mix in a dish oven (add a bit of butter to the surface so it doesnt stick)

6- Put in the oven for 25 minutes, top a bit brown. Be sure if you use a knife, it comes out clean. Then it is read.

7- Let it cool down and ready to eat!