This is a typical cake from the Veneto region in Italy. I tasted it in Venice and wanted to try myself at some point, and that happened this weekend.
I used this video and this blog as inspiration.
Ingredients:
- 1 litre whole milk (have some more extra just in case)
- 200g corn flour (semolina)
- 70g 00′ flour (plain can work too)
- 80g butter
- 100g sugar
- 50g walnuts (chopped) – optional
- 70ml Sambuca (didnt have Grappa)
- 1 tsp fennel seeds (I used caraway as I didnt have fennel)
- 1 tsp anis seeds
- 1 orange: zest + juice
- 1 lemon: zest
- 2 apples chopped in small pieces
- 8 dried figs chopped
- 50g raisins
Process:
- Pre-heat the oven at 180C.
- Prepare a tray and spread some butter.
- Soak the raisins, seeds, orange and lemon zest, juice and figs in Sambuca
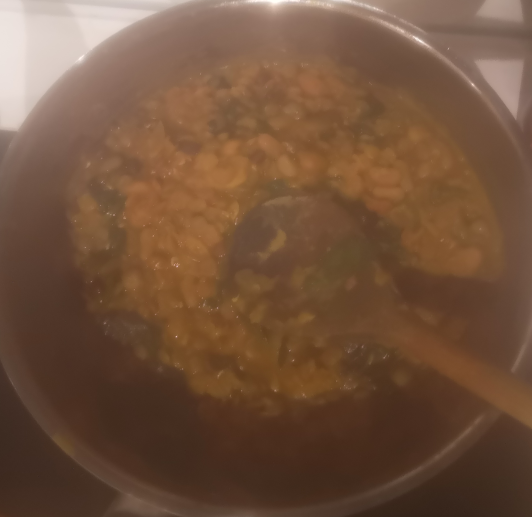
- In a big pan, bring to boil the milk. Immediately add corn and flour whisking without stopping to avoid lumps. Put at low heat now!
- If it is too thick, you can add more milk. (I think I used 1.2l milk at the end and still quite thick!!!)
- Cook for a couple of minutes at low heat, keep whisking, don’t burn it!
- Remove from heat and add butter, sugar, and the mix fruit with sambuca. Add walnuts.
- Mix all well with a spoon.
- Pour in the tray. Level it with the spoon.
- Put in the oven for 50-60 minutes.
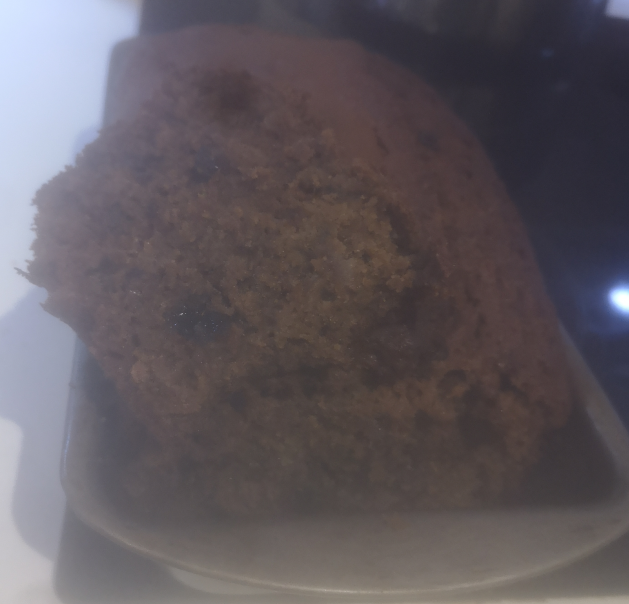
- Should be brown on top and quite moist inside if you dip a knife on it. The knife shouldnt come out clean.
- Remove from oven and let it cool down for 1h at least before trying. The polenta is very moist so it takes time to get “solid”. Next day is even better taste!
This is the result!
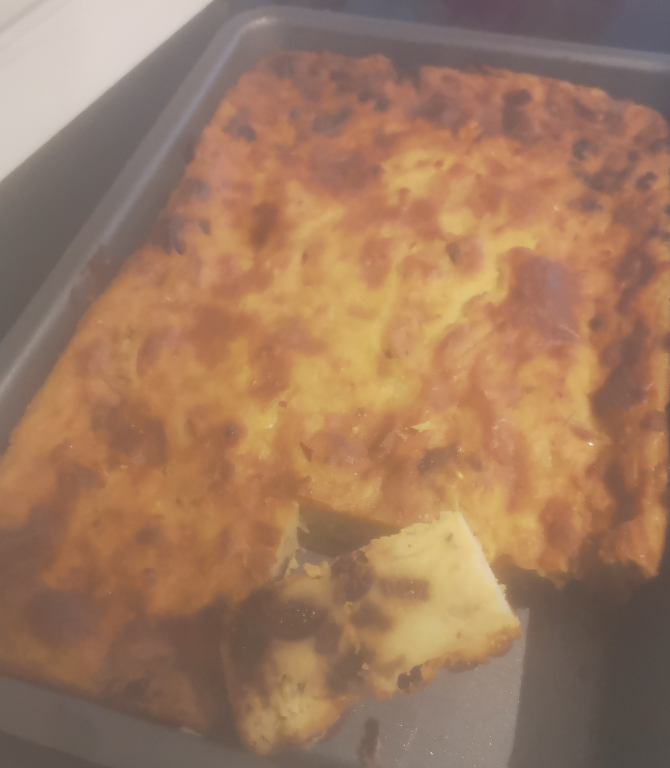
It wasnt as the one I tasted in Venice but still was pretty good!