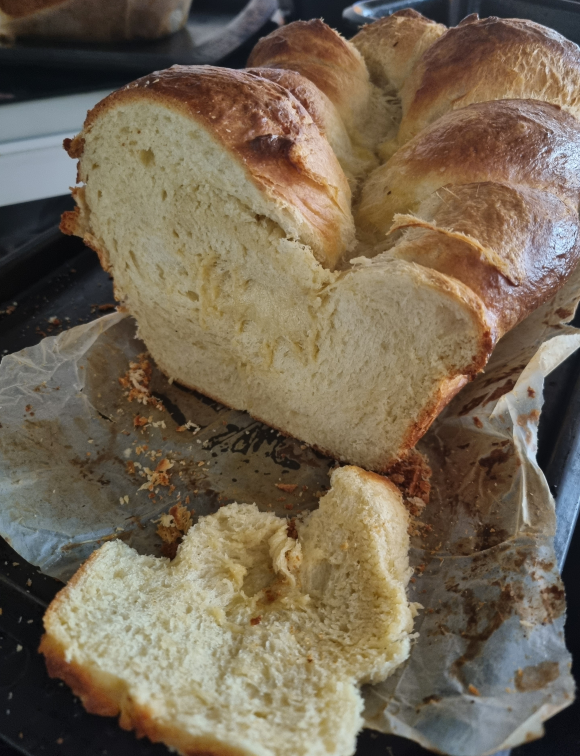
After the positive experience with Babka, I wanted to try Brioche. I did all kneading by hand. All videos I have seen use a machine. It took me 1h aprox to do all kneading and adding the butter but it was so worth it to see that I was able to achieve a dough that stopped being sticky, smooth and glossy.
Ingredients:
- 500g strong white flour
- 12g fine sea salt
- 30g caster sugar
- 8g dry yeast
- 6 eggs (1 egg aprox 50g)
- 250g softened unsalted butter. Chopped in small cubes.
- 1 egg yolk for glazing
Process:
- Put flour, salt and sugar in a bowl and mix. Then add the yeast and mix well.
- In another bowl, break all eggs, whisk them and then add them to the flour making a well in the center.
- Mix all ingredientes with one hand, once it comes together, tip the dough on the work surface. Dont add any flour!
- Use one hand for kneading and the other for the scraper.
- With the heel of your hand, push the dough into the table and stretch and tear until it stops being sticky. Use the scrapper to get the dough together and clean your dirty hand. Aprox 10 minutes.
- Let the dough rest 5 minutes
- Now, add slowly the butter to the dough in small batches. I did 6 batches… So stretch the dough a bit and add some cubes of butter, try to “integrate” them in the dough with your dirty hand. Always keep the clean hand with the scraper. Then start to stretch/tear the dough. It will become a bit “wet” with the butter but will come together again, and will not stick to the surface after some minutes. It is amazing to see that happening. Repeat the process until all butter is added in the dough.
- At the end, the dough should no sticky to the table, should be glossy, smooth and elastic.
- Put the dough back in bowl. Cover and leave at room temperature for 2h or until has doubled in size.
- Knock back the dough, cover again and put back in the fridge until next day.
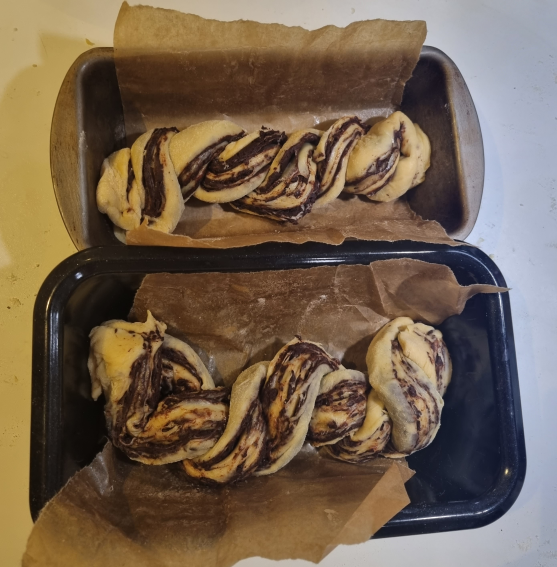
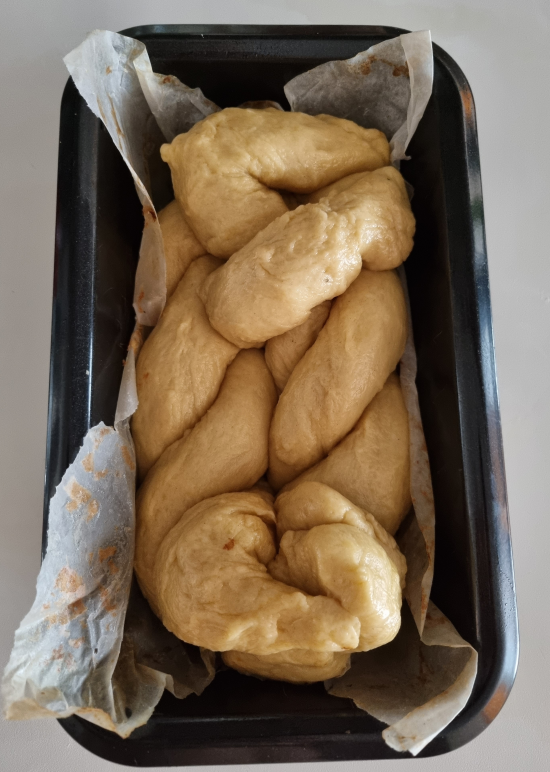
- Next day, line a tin with baking paper or grease it. I used a big tin. You can divide the dough in two if you have smaller tins.
- Take the dough and divide in 3 pieces. Aprox 360g each. Round each piece gently. Then roll each piece a bit longer than your tin.
- Time for the “plait”. Join the three ends together, then plait by lifting the middle strand and putting the right strand in the middle. The “lift” strand moves to the right and release it. Now lift again the middle strand, take the left strand and put in the middle. The “light” strand moves to the left side and release. Repeat again the same process, lift middle, move right, lift middle, move left. Until you dont have more to braid. Pinch the ends.
- Place the brioche in the tin and leave to rise for 2h aprox or reaches the top of the tin.
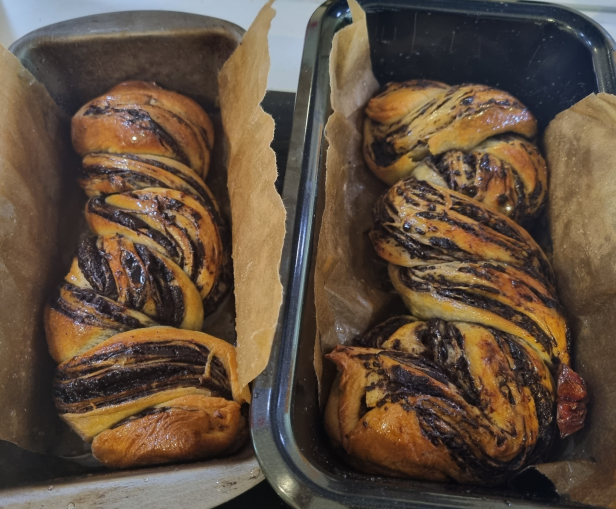
- Pre-heat the oven at 180C.
- Glaze the brioche with the egg yolk.

- Put the brioche in the oven and lightly spritz the oven with a water spray.
- Bake for 20 minutes. Then remove from the tin and bake another 5 minutes or until golden brown.
- Take from the oven and let it cool for a couple of minutes (if you can)
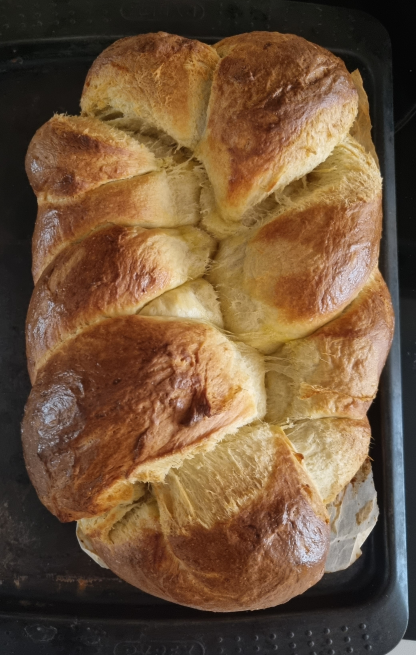
And really happy with the result!
As mentioned earlier, I was quite surprised that I managed again to tame an enriched dough. Still I can improve it:
- I did 4 strands but I have realized that 3 is better and easier to braid…..
- I should have used more egg yolk for the glaze.